This is our fifth tutorial on setting up and configuring different types of products in Magento. This time I would like to talk about virtual products.
Certainly, most Magento stores sell primarily physical goods. But if you sell a service or a different kind of product that does not need to be shipped (lack of shipping is what differentiates it from a simple product), then Magento’s virtual product is a handy solution for you.
Step 1. Setting the Attributes
Among preconfigured attribute sets is a set names Default. It is sufficient for many virtual products. However if you need a special attribute set (and attributes within it), you can create one in Magento Admin Panel.
If you have installed the sample data, you can choose attributes from the preconfigured ones in Magento sample data. If you have not installed the sample data, then you can create new attributes.
Point at Catalog in the top hoverable menu and select Manage Attributes in Attributes category.

In the next page click Add New Attribute button.
When you create an attribute, one of the important settings is the Scope setting. If you have multiple websites, stores or views, you will need to set the scope to select where you want the settings to apply: Store View, Website or Global.
If the Scope is set to Store View, then the product can be configured differently for each view. For a multilingual webshop Store View configuration allows fields to have different values for each language. But Global is the right option for the attributes that are universal in throughout the whole system. If Scope is set to Website, it will be applied across the whole website, including different languages.
Once you have created the attribute, add it to an attribute set. When creating your virtual product, you will need to select the required attribute set.
For our example I created an attribute set called Support Service.
Step 2. Creating a Virtual Product
Now, to start creating a virtual product open the hoverable Catalog dropdown menu in the top navigation bar and choose Manage Products option. In the page that opened click Add Product button.
In the next page, choose the relevant set of attributes (in our example it is Support Service) from the Attribute Set drop down-menu, and from the Product Type drop-down menu select Virtual Product and click the Continue button.

In the New Product page you will see a left-side menu with all kinds of settings that can be relevant to this product. You go through the tabs and make settings similar to those in simple products. However for the virtual product there are a few tabs on which I would like to concentrate to help you set them up correctly.
In General tab fill out the name of the virtual product (in our example, Magento Support Service) and in the Description enter complete service specification and in the Short Description field enter the general outline of the service, as it is the first thing your customer sees upon opening the page. SKU field is for the stock-keeping unit, the value in this field must be unique for each product.
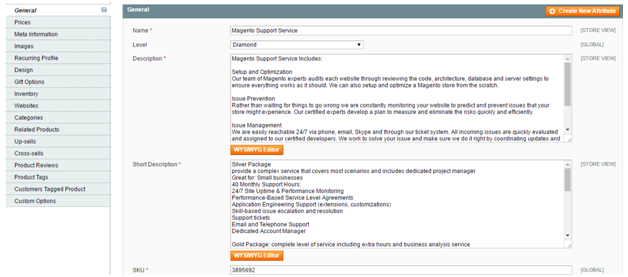
There will be a few more settings in the General tab: the fields called Set Product as New from Date and Set Product as New to Date allow you to set a date range, and during this period the product will be considered new. Or the fields can also be left empty.
Set Status drop-down menu to Enabled if you want the virtual product to become available for purchase on the website. URL key is the URL path to the product page. You can fill out this field yourself. And if you do so, use only lowercase letters, numbers, hyphens or underscores. It should be unique for every product. If you do not fill it out, the URL key will be automatically generated using the ‘name’ field value. Visibility to either Catalog, Search or both depending on how you want the product to be displayed in the product catalog and the search results page.
Next you open the Price tab in the left-side menu.
Step 3. Setting the Price & Availability
Enter the price of your virtual product in the Price field. If you want to add a different price for customers that are included into certain groups, you can do so in the Group Price section.
To offer your virtual product at a discounted price, you can enter an amount in the Special Price field. You also can set the period, during which this discount will be valid in Special Price from Date and Special Price to Date fields.

This way the product will be sold at this special price and the standard price you have entered in the Price field will appear crossed out like this on the front-end:
The Cost field is optional, you can set the service cost of the service for the provider here.
In the Tier Price section you can set discounts based on quantity of purchased virtual products.
Next you will see Apply MAP section. MAP stands for Minimum Advertising Pricing and you can select one of two options in the drop-down menu: Yes or No. If you go with Yes, then you will be able to choose one of the options in the Display Actual Price drop-down menu. Depending on your preference, you may choose how you want the actual price appear on the frontend: only when the virtual product is In Cart, Before Order Confirmation (so that the product price is shown only at the Order Review stage of the checkout process), On Gesture (when the Click for price link is clicked and the popup window with the price and the popup message description is displayed) or Use config (for custom settings). As you can see, you are also able to enter Manufacturer’s Suggested Retail Price.
NB. If you want to enable the Minimum Advertising Price, you will have to go to select Configuration under System in the top navigation menu. Next you go to Sales section in the left side menu, under Sales section click Minimum Advertised Price to enter the relevant data.
Finally, in the Price tab of your virtual product you need to select an option in the Tax Class drop-down menu.
Now click Save and Continue Edit button.
Next go to Inventory tab. Here you need to put the quantity of virtual products (or service packages) that you are able to sell. You choose Yes in Manage Stock drop-down menu and press Save. This setting will enable you to change the status of the product to Out of stock manually should you need to. For instance, you may need this option when you want to make the virtual product temporarily unavailable but still visible in the catalog (for lack of resources to provide this service) so that your clients can expect this product to be available again later. Finally, do not forget to set Stock Availability to In Stock. Otherwise the product will not be visible on the front-end.
Step 4. Other Settings
As for the other tabs in the left-side menu, you may enter additional information. In Meta Information tab you can enter your Meta Title, Meta Keywords and Meta Description. These are good for your website’s SEO.
In Images you are able to upload an image for your virtual product, or a few images as well as the order in which they will be displayed. But make sure you set where the images will be displayed with the help of radio buttons in the columns Base Image, Small Image, Thumbnail. Otherwise the images will not be displayed on the front-end.
NB. To start uploading images you need to click the Browse Files and Upload Files buttons. If you do not see these buttons, it is likely that you do not have Flash installed or it is blocked by your browser.
In Recurring profile tab you can offer your customer a subscription or a different type of auto-billing plan.
If you have a multilingual online store, you can select in which of the languages the product will be listed in Websites tab. In Categories tab you have to select the catalog categories, in which the product will be listed.
Step 5. Custom Options
Custom options tab offers an easy way to offer your customer a selection of product variations that do not depend on attributes.
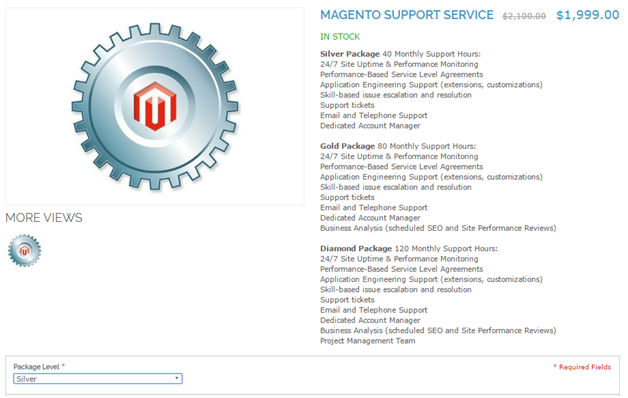
In our example we wanted to offer three packages of Magento Support: Silver, Gold and Diamond. The packages come at different prices, and this is easily arranged with the help of Custom options.
But keep in mind the limitations: you cannot track inventory based on any variation. Also, a product with custom options cannot be used with a configurable, grouped, or bundle product. Still, custom options are a great solution if your inventory needs are simple.
You start by clicking the Add New Option button. You can enter the name and the unique SKU of each option, select the Input Type (whether you want your customers to select the options from a drop-down menu or by selecting one of radio buttons – the options are numerous), configure whether the a value is required, determine order etc.
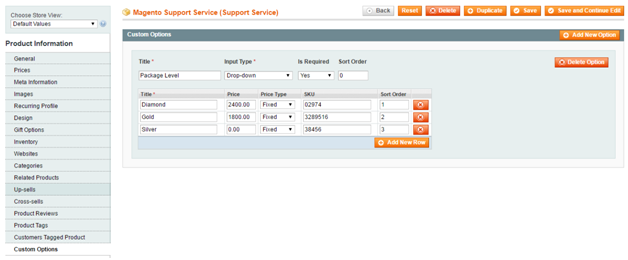
In the Price column you can either leave the field empty, thus keeping the default price. However if you want to adjust the price for each option, you can enter a value (positive or with a minus to decrease the default number).
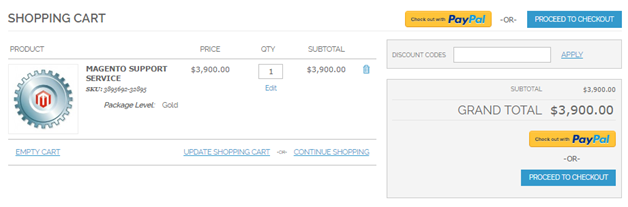
Now, click the Save button in the upper right corner and look on the front-end.
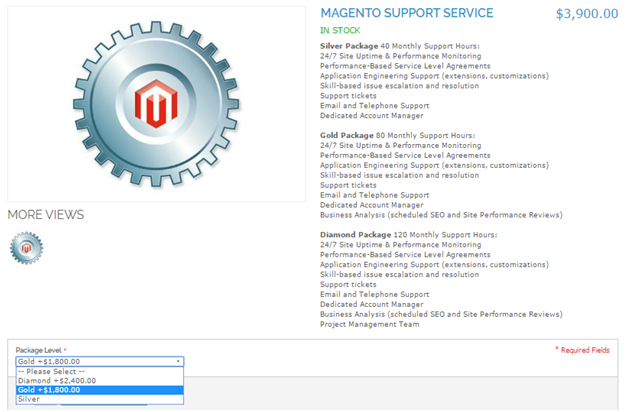
Test to make sure that all settings work right and the price settings work correctly.
I hope this tutorial helps you configure your virtual products. Maven eCommerce team of developers is involved in creating numerous web stores facing complex admin issues on the daily basis. Please don’t hesitate to contact me if you have any questions or simply leave your comments below.